How to Replace a Bathtub Drain?

A leaking bathtub drain rarely announces itself with a dramatic flood. More often, a dark ring appears beneath the tub, or water disappears slowly after each shower. This guide explains How to Replace a Bathtub Drain with practical steps, suitable tools, and realistic expectations. Bathtub Drain Replacement usually involves removing the stopper, loosening the drain fitting, cleaning the opening, and installing a new assembly. You may need a drain wrench, adjustable pliers, plumber’s putty, a flashlight, gloves, and several dry towels. Keep a bucket nearby. Small parts often fall into awkward spaces.

Older drains can be stubborn. Corrosion may hide damaged threads beneath the visible flange. Do not force a fitting blindly. That mistake can crack surrounding plumbing or damage the tub surface. Work slowly, protect the enamel with a cloth, and inspect the waste pipe before tightening anything. A replacement drain should match the tub’s thread size and stopper design. Manufacturer instructions remain important, especially for plastic or specialty assemblies. Not every leak comes from the drain itself. Water may travel from the overflow plate or a nearby joint. Check the source carefully. After installation, run a small amount of water and inspect underneath for several minutes. Then test the stopper. A perfect seal may require one adjustment. That is normal. If the pipe moves, the metal is badly corroded, or access is limited, a licensed plumber can prevent a minor repair from becoming expensive water damage.
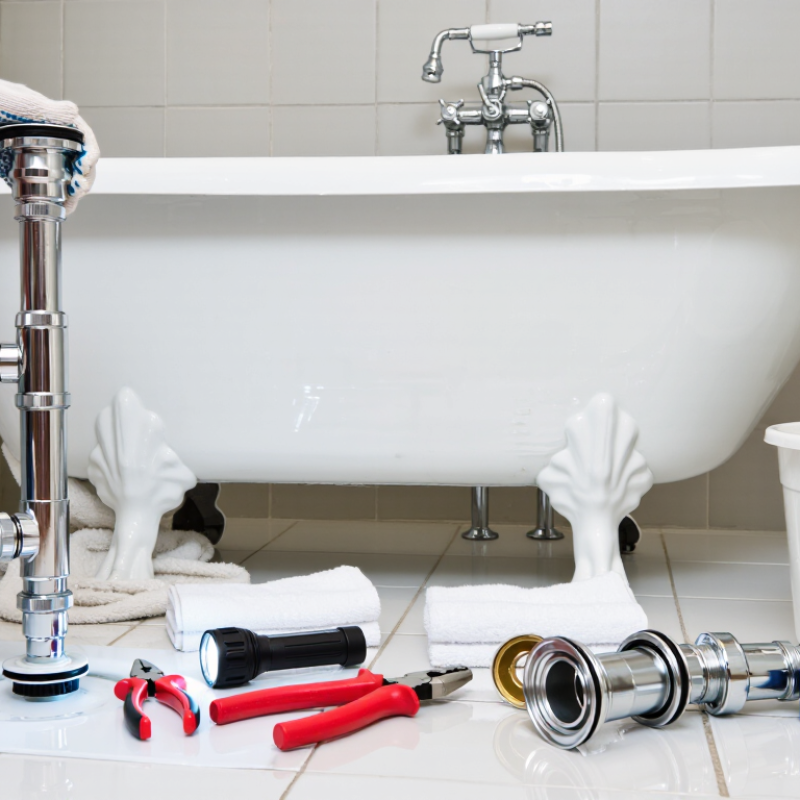
How to Replace a Bathtub Drain?

Tools and Materials Needed for Replacing a Bathtub Drain

How to Replace a Bathtub Drain?

Replacing a bathtub drain starts with the right tools and materials. Prepare a drain wrench, adjustable pliers, a flat screwdriver, a utility knife, and a small bucket. You may also need a flashlight, gloves, a soft cloth, and a plastic scraper. For materials, choose a compatible drain assembly, plumber’s putty, and a new rubber gasket. Measure the existing drain before purchasing anything. Thread sizes can vary, and guessing often causes leaks.

The U.S. Environmental Protection Agency reports that household leaks waste nearly 10,000 gallons of water annually on average. A poorly sealed bathtub drain can add to that waste and damage the floor below. Remove the stopper and loosen the old drain with the drain wrench. Clean the opening carefully, because hardened putty can hide scratches or corrosion. Apply a thin, even bead of putty beneath the new flange. Tighten it firmly, but do not force it. Over-tightening may distort the gasket. That mistake is easy to make.

Tips

Keep a towel under the drain opening. Test with a small amount of water first. Then inspect the ceiling below, if accessible. The EPA’s WaterSense program recommends checking for leaks after plumbing repairs. If the drain shifts, smells unusual, or still drips, stop and reassess the gasket, threads, and alignment. A second inspection may feel unnecessary, but it can prevent expensive moisture damage.

How to Remove the Existing Bathtub Drain Safely

How to Replace a Bathtub Drain?

Removing an old bathtub drain safely starts with controlling water and movement. Close the drain stopper, dry the tub, and place a towel over the surface. The towel protects the finish and prevents small tools from sliding. Shut off the nearby water supply if the waste pipe may be disturbed. A drain wrench, adjustable pliers, gloves, and a flashlight are usually enough. I still inspect the pipe below the tub before turning anything. Access is often tighter than expected.

Insert the drain wrench into the crossbars, then turn counterclockwise with steady pressure. Do not use sudden force. Old metal can crack, and damaged threads may require access beneath the tub. If the drain does not move, apply a suitable penetrating fluid and wait briefly. Avoid heating the fitting near sealants or plastic parts. I once assumed a drain was simply stuck; the real problem was a corroded crossbar. That mistake taught me to check twice.

After removal, scrape away old putty carefully and inspect the flange, gasket, and drain shoe. EPA WaterSense reports that household leaks can waste nearly 10,000 gallons annually, so leak prevention matters. CPSC NEISS injury surveillance also identifies bathrooms as frequent locations for slip and fall injuries. Keep the floor dry and tools organized. Before installing a replacement drain, test the exposed pipe for movement. If the pipe shifts, threads crumble, or water appears below, stop and call a qualified plumber. Forcing the job can turn a simple replacement into concealed water damage.

How to Prepare and Fit the New Drain Assembly

Replacing a bathtub drain begins with careful preparation, not force. Before removing anything, confirm the new assembly matches the drain size, stopper style, and tub outlet. Clear the tub, then cover the surface with a soft towel. Remove the stopper and clean hair, soap, and mineral deposits from the opening. Use a drain wrench carefully to avoid scratching the finish. Inspect the exposed threads and gasket seat for corrosion or cracks. I once rushed this step and damaged an old fitting, creating extra work.

Dry-fit the new drain assembly before applying sealant. Check that the drain flange sits flat and aligns with the waste pipe. Apply plumber’s putty only when the assembly instructions permit it. Some tub materials require silicone sealant instead. Place the gasket beneath the tub, then thread the flange into the fitting by hand. Keep it level. Tighten it with a drain wrench until snug, but do not overtighten. Excessive pressure can crack a fragile tub or squeeze out the sealant.

Reconnect the stopper and adjust its linkage if it moves poorly. Allow the recommended curing time before testing the drain. Then run a shallow layer of water and inspect underneath with a dry tissue. A small leak may appear slowly. If water reaches the gasket or pipe joint, loosen the assembly and check its alignment rather than adding more sealant. Pause there. Hidden moisture can damage surrounding flooring.

How to Replace a Bathtub Drain? - How to Prepare and Fit the New Drain Assembly
Step Task Typical Time Recommended Tools or Materials Key Measurements, Actions, and Checks
1 Identify the Drain Assembly 10–15 minutes Tape measure, flashlight, adjustable wrench, screwdriver Confirm whether the tub has a toe-touch, lift-and-turn, push-pull, or trip-lever stopper. Check whether the visible drain flange connects to a standard waste-and-overflow assembly.
2 Measure Before Purchasing 10 minutes Tape measure, notepad, existing drain components Measure the drain opening and note the thread style, stopper type, and overflow configuration. Many common bathtub drain openings are approximately 1.5 inches, but the existing fitting should be measured rather than assumed.
3 Prepare the Work Area 10 minutes Drop cloth, bucket, towels, work light, gloves, eye protection Protect the tub surface and place a bucket beneath accessible waste piping. Keep small washers and screws in a container. Wear eye protection when scraping old sealant or working beneath the tub.
4 Remove the Stopper 5–15 minutes Screwdriver, adjustable pliers, penetrating oil if needed Remove the stopper according to its mechanism. For a trip-lever type, remove the overflow plate and carefully withdraw the linkage. Avoid forcing corroded parts, because the linkage may separate inside the overflow pipe.
5 Remove the Old Drain Flange 10–20 minutes Tub drain wrench or drain key, adjustable wrench, penetrating oil Insert the drain tool into the flange crossbars and turn counterclockwise. Apply steady pressure. Do not use excessive force against a fragile or damaged crossbar, as it can break and leave the threaded section in the drain shoe.
6 Clean the Drain Seat 10–15 minutes Plastic scraper, old cloth, mild cleaner, non-abrasive pad Remove old plumber’s putty, sealant, hair, and mineral deposits from the tub surface and drain threads. The drain seat must be smooth, dry, and free of debris so the new flange can seal evenly.
7 Prepare the New Flange 5–10 minutes New drain flange, plumber’s putty or compatible sealant, clean cloth Apply a continuous rope of plumber’s putty beneath the flange lip when permitted by the fitting instructions. For tubs made from materials that may stain or react with putty, use a sealant specifically approved for the tub surface.
8 Fit the New Drain Assembly 10–20 minutes Drain wrench, adjustable wrench, new gasket, screwdriver Thread the flange into the drain shoe by hand first to prevent cross-threading. Tighten with the drain tool until secure and evenly seated. Do not overtighten, because excessive force can damage the tub, gasket, or drain threads.
9 Install the Stopper 10–20 minutes Screwdriver, pliers, replacement linkage if required Install the new stopper or reconnect the overflow linkage. Operate the handle several times and adjust the linkage so the stopper closes fully while still lifting high enough to drain the tub.
10 Remove Excess Sealant 5 minutes Plastic scraper, damp cloth Wipe away squeezed-out putty or sealant before it hardens. Keep sealant out of the drain opening and avoid scratching the tub finish with metal tools.
11 Perform a Leak Test 10–15 minutes Bucket, dry paper towels, flashlight Close the stopper and add several inches of water. Inspect beneath the tub and around the flange for moisture. Then open the stopper and run water for several minutes while checking the drain connections again.
12 Final Inspection 5–10 minutes Flashlight, dry cloth, screwdriver Confirm that the stopper seals, drains smoothly, and does not rub against the flange. Recheck accessible connections after the first full drain cycle and tighten only if a leak is present.
— Common Warning Signs As needed Flashlight, replacement parts, professional assistance when necessary Stop and reassess if the drain shoe moves, the tub flexes, the overflow pipe is cracked, threads are badly damaged, or water leaks from an inaccessible connection. These conditions may require access to the plumbing beneath or behind the tub.

How to Seal and Tighten the Replacement Drain

Replacing a bathtub drain is mostly a sealing job. A clean connection matters more than brute force. After removing the old drain, scrape away every piece of hardened putty from the tub surface. Wipe the opening with a dry, lint-free cloth. Even a thin crumb can create a slow leak.

Roll fresh plumber’s putty into a rope about 1/4 inch thick. Press it evenly beneath the replacement drain flange, without leaving gaps. Some acrylic or fiberglass tubs require silicone instead, so check the drain instructions and tub material first. Lower the flange into the opening, then thread the drain body from below. Keep the flange centered while tightening it with a drain wrench. Stop when the putty squeezes out evenly around the rim. Tighten firmly, but do not force it. Excess pressure can crack a delicate tub or distort the gasket.

Remove the squeezed-out sealant with a plastic scraper and a damp cloth. Install the lower gasket and locknut according to the drain design. Hold the drain steady while tightening underneath. I once tightened a drain too aggressively and caused a faint stress mark, which was an unnecessary repair. Test slowly. Add a few inches of water, wait several minutes, and inspect underneath with a dry paper towel. No moisture should appear. If silicone was used, respect its full curing time before regular bathing. A rushed water test can hide a weak seal.

How to Test the New Drain for Leaks and Proper Flow

How to Replace a Bathtub Drain: Testing for Leaks and Proper Flow

After installing the new bathtub drain, wipe every connection completely dry. Place a dry tissue beneath the drain body and overflow linkage. Small leaks often appear as dark spots before water becomes visible. Fill the tub with several inches of water, then wait for ten minutes. Inspect the tissue again. The U.S. EPA WaterSense leak factsheet reports that household leaks can waste more than 10,000 gallons of water yearly. That makes this simple test worth the effort.

Now remove the plug and watch the discharge. Water should move steadily without pooling, bubbling, or making repeated gurgling sounds. Run the shower for two or three minutes, then check the drain from below. Use a flashlight, but do not touch wet electrical equipment. A bucket beneath the outlet can reveal slow drips that a quick glance misses. If flow seems weak, remove hair or debris before blaming the new drain. I have found that a slightly misaligned gasket can pass a short test and fail after repeated use. That is easy to overlook.

Let the tub empty fully, then repeat the tissue test once more. Check the ceiling below, if accessible, after thirty minutes. Do not overtighten the drain flange; excessive force can distort the seal. EPA plumbing guidance emphasizes fixing leaks promptly, but proper drainage also depends on clean piping and correct slope. A final, longer test is safer than trusting one successful rinse.

How to Replace a Bathtub Drain: Drain Size and Leak Testing

The chart compares the theoretical circular opening area of common nominal bathtub drain sizes. Area is calculated with π × (diameter ÷ 2)²; actual drainage performance also depends on the stopper, trap, pipe slope, and blockage.

Leak and flow test: After installing the new drain and applying the manufacturer-approved seal, fill the tub with several inches of water. Inspect the drain flange, overflow connection, and the plumbing below while the water is stationary. Open the stopper and confirm that the water drains steadily without pooling. Check underneath again during drainage and repeat the test after the fittings have dried.